Tuesday, March 25, 2014

I've Moved to a New Blog!

Hi there!

Since having my 3rd child, my days have become more than just "life with twins."  So, I decided to move on over to a new blog!

Come check me out at www.MePlus3Today.blogspot.com!


My new blog deals with kids crafts and activities, mommy ups & downs, and what it's like to suddenly find myself as a 30-year-old widow with 3 kids under the age of 2.

So again, please stop by my new blog, and tell your friends too!

Thanks so much!

~Sarah


Thursday, February 20, 2014

6 More Acts of Kindness!

The following is an excerpt from another blog I began writing after my husband passed away.  I just wanted to share on this blog because I had been searching Pinterest for ideas on how to Pay It Forward.  I hope that by sharing, someone else might be inspired to do these or similar Acts of Kindness.  If you do, please share in the comments, or let me know of other good deeds you did!  Thanks!
____________________________________________________________


So, remember how I had started doing some Acts of Kindness to Pay it Forward during the Christmas season?  Well, I'm trying to continue doing more of that stuff throughout 2014.  January is almost done, and I think I've been doing pretty good so far!

Here's [6 more Acts of Kindness]:


1)  I let someone go in line ahead of me at Kohl's.  I had $20 worth of Kohl's Cash to spend, and I had found $21 worth of stuff to buy (you know that's how I roll!).  Well, there were 3 check-outs open, and as usual, I pick the one with the slowest people ever in front of me.  I could see one of the lines moving a lot quicker, there was actually nobody behind the current person checking out.  Instead of switching lines myself, I pointed it out to the person in front of me (the person ahead of her was the one being ridiculously slow with her purchase) and let her take that spot, so she was able to check out faster.  It wasn't anything major, but I still consider it an Act of Kindness. :-)

2) I brushed snow off the car parked next to me at work as I was leaving one day.  Ever since then, I try to brush off snow on the passenger side of the car next to me, so that way the person doesn't have to walk around their entire vehicle to brush it off, or hopefully it saves them at least 30 seconds of time in the cold!  I'm on that side of their car anyways, getting into my driver's seat, so it's just a quick swipe as I walk by.

3)  I recycled some of the Christmas cards we received with this unique method from St. Jude's Ranch for Children.  Basically, they recycle cards and then sell them to raise money for their program.  Good for the planet and good for people too!  Someone at my work was sending in a box, so I was able to include mine with his large shipment.

4) I made a small donation to Momsbloom to express my thanks for the help they provided after Will was born.  You and I had meant to do that anyways, right after I had returned to work from maternity leave.  But with the madness that ensued a month later, I obviously never got around to it until now.

5)  I donated your frequent flyer airline miles to the Make-A-Wish Foundation.  I hope that's OK with you! :-)  At first I thought I would have to go through the hassle of having your miles transferred into my name, and all that junk.  But then I realized I just needed your frequent flyer number (which was in our joint email account, so it was easy to find), so I just entered that info in, and boom, over 20,000 miles donated!  I know you won't be using them, and I didn't want them to go to waste... So, when I discovered that miles could be donated, I saw it as another opportunity for kindness!  I also discovered that you can donate miles directly from most major airlines websites.  There are quite a few organizations that accept these donations from the airlines website.  But I just went straight through the Make-A-Wish Foundation's website, just to make sure they were going to the right place!

6)  I signed up to be a bone marrow donor!  As you know, my cousin's daughter has Fanconi Anemia (FA), and I think one of the treatments is a bone marrow transplant (at least, from what I understand...), so that is how I learned about becoming a bone marrow donor.  The process was really easy, I took a bunch of pictures of the packet of stuff I got (see below).  All I had to do was take a swab to the inside of my cheek, and send it in the envelope they provided.  If I'm a match for somebody, the process doesn't sound too bad for the donor (I think it's more complicated for the person actually receiving it though...).  I think since I can't donate blood (remember when I puked two different times all over the Innotec gym, once was beautiful Oreos...), I figured this was a unique opportunity to possibly help somebody someday.  Each packet comes with another kit for a friend to sign up to be a donor, and for some reason I received 2 packets, so maybe I'll find 2 other people I know to sign up (that would be like extra credit for this Act of Kindness!).  

The bone marrow donor packet that arrived in the mail.

Info on the back of the packet.

I have another kit for a friend if I can find one who wants to become a donor too (I actually have 1 more because I got 2 packets for some reason!)

Stuff on the inside of the packet.

More stuff from the packet, like the envelope and the swabby things.

Info on the back of the envelope that you put the swabby things in.
See, I told you a took a bunch of pictures of the stuff... I'm picture crazy like that! :-)

So yeah, those are some of the little things I've been doing lately.  I really liked these little Acts of Kindness because they were easy and free (except the Momsbloom thing, but that was planned a long time ago).  Thinking of things to do, and researching different charities and organizations has kept my mind occupied, and given me an outlet for something to do.  I think I'm doing pretty good on this New Years Resolution so far.  But it is only January still... :-P


If you haven't read about our first 8 Acts of Kindness, click here to see that post!

UPDATE: Since having my 3rd child, my days have become more than just "life with twins."  So, I decided to move on over to a new blog!

Come check me out at www.MePlus3Today.blogspot.com!
My new blog deals with kids crafts and activities, mommy ups & downs, and what it's like to suddenly find myself as a 30-year-old widow with 3 kids under the age of 2.

So again, please stop by my new blog, and tell your friends too!

Thanks so much!
~Sarah

8 Acts of Kindness

The following is an excerpt from another blog I began writing after my husband passed away.  I just wanted to share on this blog because I had been searching Pinterest for ideas on how to Pay It Forward.  I hope that by sharing, someone else might be inspired to do these or similar Acts of Kindness.  If you do, please share in the comments, or let me know of other good deeds you did!  Thanks!
____________________________________________________________

...I've been trying to get some Christmas cheer by paying those blessings forward.  That's what the Christmas spirit is supposed to be, right?  It is better to give than receive...

I guess some people call it Pay It Forward.  Others call it Acts of Kindness.  I guess we are doing Acts of Kindness to Pay It Forward... :-P

And I'm really trying to get the kids involved too.  They might not completely realize what I'm trying to do, but it'll sink in eventually, and I hope they'll love to give instead of get as they grow up.

I've read that some people do 25 Acts of Kindness, for the first 25 days of December leading up to Christmas.  That seemed a little out of our league right now, so we are just doing what we can, when we can.  Also, it seems like a lot of Acts of Kindness involve money, and we have done some things that cost money, but I am also trying to do "free-ish" Acts too, so we can keep on our budget!  :-)

Here are [8 Acts of Kindness] we've done so far:


1)  We put a toy in the Toys for Tots collection bin at the kids’ daycare.  I chose Monopoly as our toy, in honor of you.  You loved that game (even though you were a big cheater!). J  Plus, it was on sale for only $5.  Score!  I want the kids to be involved in our acts of kindness, so I tried to have the girls put the game in the box, and take a picture of them doing it.  Yeah, I’m sure you can guess how that went...  They wouldn’t take the game from me, they just stood there staring like, “huh…?”.  Oh well, if we keep doing it every year, I’m sure they’ll be excited about it eventually! 

2)  Since November, we've been decorating supper sacks for the organization in Grand Rapids called Kids Food Basket.  They provide suppers for kids who likely won’t have a meal when they get home.  I figured decorating the sacks would be something the girls could do.  So, I bought a bunch of brown paper sacks from GFS.  Then, I put the girls in their chairs with crayons and markers, and let them get to work!  I even decorated a few too, although the girls artwork probably looks better than mine! J  I had help from M and T on a bunch too.  The pack I bought had 500 sacks in it, so we definitely won’t be able to decorate them all, but I’m sure the organization will appreciate the blank ones too.  This Act of Kindness has probably been one that the girls participated in the most.  And Will can get involved with this next year!


Charlotte getting ready to color a supper sack!

Charlotte hard at work!


Violet hard at work!

Violet working on her supper sack!


A different day of coloring supper sacks.

A different day of coloring supper sacks.


Coloring!


Some of the bags the girls and I decorated. :-)  At this time, we had about 110 completed!!!

Some of the bags M & T decorated! :-)


3)  We had A LOT of diapers donated to us.  Unfortunately, big Will has grown out of size 3 diapers and we still had quite a few boxes of that size left.  So, I passed along the donated diapers to an organization out of Holland called Nestlings.  I brought over 300 size 3 diapers (3 boxes) to a donation drop-off near work.  I think that could diaper 1 baby for over 30 days!  We also ended up supporting this same organization at work for our Christmas Giving, so I brought in 2 more packages of diapers for that collection. I think we still have even more that I plan on passing along to others as they need them.

4) In more baby related Acts of Kindness, I gave L & B one of our infant car seats and 2 bases to go with it for their new baby grandson.  I know they were going to try and save money by purchasing a used car seat, so I'd rather have them get a car seat that they know is safe than to buy one from a stranger.

5) I volunteered to be on the Christmas Giving Team at work this year, where we supported the Grand Rapids Home for Veterans and as I said before, Nestlings.  I didn't actually do much because of my schedule, but I helped where I could.  I also passed along a gift card to a store that I don't shop at, so the team could shop for anything that was left on the list of items needed.

6)  A different department at work sponsored an elderly care home called Rest Haven.  They set up an "Angel Tree" type of thing, where each member of the home had a few items on their "wish" list.  So, I grabbed one of the names off the tree, and thanks to my attempts at "super couponing", I was able to snag her items for under the $15 limit.  They required multiple items to be wrapped in one package, as each person was only allowed to open one gift at the home's Christmas party.  In trying to get the kids involved, I tried to have the girls "help" me wrap the box... Um, that probably wasn't my best idea.  They just wanted to walk all over the wrapping paper.  Hopefully the person opening our gift didn't realize how wrinkled the paper was! :-)

Our gift to someone at Resthaven!

Charlotte holding the tag from the Angel Tree.


Will "helping" wrap...

Violet "helping" wrap our gift to someone at Resthaven.

Will "helping"...

Being good helpers!

Putting tape on!


Our gift ready to put under the Angel Tree at work!


7)  This is dorky, but thanks to Pinterest (click here to see the original blog with the printable I used), I put this little present in the mailbox for our mail carrier.  I feel like that person has been working a lot of overtime or something, because I got a package on a Sunday, two weeks in a row!  So I just wanted to show our appreciation for their hard work!

A little something for our mail carrier! :-)

8) Someone told me about another woman in the area who is also 30-something, and her husband passed away suddenly a couple months after you did.  They also had young kids.  I told the person to pass along my email address to her, if she ever wanted to talk to someone who totally understood what she was going through.  I haven't heard from her yet, which I completely understand.  But I sent her an anonymous gift card to Amazon.com, because I know it's hard to find time to get to the store, and shopping online is so convenient.  Plus, you can buy anything from Amazon, whether it be necessities like toilet paper or diapers, or just something nice for herself.  I hope it helps her out in some way, even if it just makes her smile when she gets it.

Since writing this, we've done 6 More Acts of Kindness!  Click here to read about those! 

UPDATE: Since having my 3rd child, my days have become more than just "life with twins."  So, I decided to move on over to a new blog!

Come check me out at www.MePlus3Today.blogspot.com!
My new blog deals with kids crafts and activities, mommy ups & downs, and what it's like to suddenly find myself as a 30-year-old widow with 3 kids under the age of 2.

So again, please stop by my new blog, and tell your friends too!

Thanks so much!
~Sarah

Thursday, April 18, 2013

9 Baby Items That are Great for Newborn Twins!

*Disclaimer: This post contains affiliate links
What are some baby items that you absolutely LOVE?  Is there anything you didn’t think you needed, but now you can’t live without?  What helps you the most?  What was the weirdest, yet coolest thing you received or bought? 


Yeah, yeah, we have the girls so we already have lots and lots and lots of baby stuff. But I’m just wondering if there is something really neat/helpful/awesome out there that we just don’t know about because we don’t have it, or have never heard of it, or just thought we didn’t need it.  I don’t want to miss out on anything!  And since Will just arrived, I figured we could make a fresh start with him, or even find something great for the girls!  So leave a comment here or send me a message and please let me know about your favorite baby items.

Here are 9 of the items that I LOVED, especially in regards to twins, but they would also be great for a single baby too!  Please remember that the following is just my own opinion, some might agree while others disagree with the products that I LOVED!


1. Fisher-Price Newborn Rock n' Play Sleeper – We only had 1 of these, but it was fabulous!  This was where Charlotte spent most of her time as a newborn.  In the early months, I couldn’t figure out how to tandem feed (feed both girls at the same time), so Charlotte would hang out in the Rock-N-Play while I fed Violet.  It was portable; I could move it anywhere and everywhere!  Typically I had it right in front of me, with Charlotte facing me.  I would rock her with my foot while I was feeding Violet and she would nap in it.  I would move the sleeper into the kitchen and a baby would hang out in it while I was loading the dishwasher.  It was just a great “baby holder.”
Charlotte in the rock-n-play sleeper

2. Arm's Reach Ideal Arc Original Co-Sleeper Bedside Bassinet – We used this as our bassinet.  It was our intent to use it in the co-sleeper function, but after having a C-section, we ended up just using it in the free-standing bassinet form.  I loved it because the weight limit was high enough that it could hold both girls, so we only needed 1 bassinet!  They slept in this together until they were 3 months old, when we finally transitioned them into their cribs.  Plus, we continue to get use out of it because it also functions as a full size pack-n-play when you take the bassinet hardware out.  So we use it as a travel bed for one of the girls when we visit our in-laws in Illinois (we bought another pack-n-play for the other baby to sleep in).
The girls in the Arms Reach co-sleeper/bassinet on our first day home from the hospital (and me passed out next to them  :-))

3. Medela Symphony Breast Pump – This is specific for twins/multiples only… I honestly feel like having a hospital grade pump was one of the main reasons I was able to keep up with feeding the girls, plus pumping extra to freeze and store for as long as I did.  I don’t really have anything to compare it to, but if you are having/have twins and are looking for a pump, I suggest renting one from the hospital (or where ever else you can rent them from).  I calculated our cost for renting, and I was able to rent the pump for about 7 months at the same price as purchasing a pump from the store.  With Will, I will be using a Medala Pump-in-Style, so we’ll see how the suction power compares on that!J
4. Jumperoo – Are you kidding me?? Whoever invented this contraption was a genius!  We had the Fisher Price Rainforest jumperoo, but I think any freestanding jumperoo would work.  This entertained the girls for long stretches of time (like up to 30 minutes!)!  We only had 1, so the other baby would be in our exersaucer (which we also had only 1), but they would do great in them.  Violet could bounce forever!  They would play in these while I ate breakfast or lunch, or while I was trying to get anything else done.  I can’t wait to see how Will enjoys the jumperoo someday!
Violet in the exersaucer and Charlotte in the jumperoo

5. Swaddles – Something small that I think is a ‘must-have’ is some type of swaddle that Velcro or zips shut.  It makes swaddling so much easier. You don’t have to master any special technique to get the perfect baby burrito!  You just put the baby in, fasten some Velcro, and BOOM, they are all cozy and snug!  It was great in the middle of the night when you are too tired to think.  Plus, my girls were never able to “break out” of them. We had the SwaddleMe Velcro and the Summer Infant Newborn SwaddlePod Our girls were able to fit in them until they were just over 3 months old.  After that, we decided to stop swaddling, but for the first 3 months, these were a life-saver!
Charlotte and Violet in their SwaddlePods


6. Vasaline/Petroleum Jelly – Ok, weird, I know!  But it seems like newborns have a poopy diaper every single time.  I wanted to make sure their buns were protected, but I though creams like Desitin were a little too much for their newborn bottoms.  So, we globbed on Vaseline (petroleum jelly) at every diaper change.  Not only did it protect them from wetness and keep their buns from getting chapped, but it made yucky messes easier to wipe off.  I also keep a separate tub labeled “Face”, to use on their nose when it is running all the time and we are wiping it so much it gets raw.  Their cheeks also occasionally get chapped from who knows what, so I’ll swipe it on their cheeks every once in a while too.

7. 8. 9. Snap-N-Go Stroller & Infant Car Seat & Infant Car Seat Cover - Ok, last but not least, is the combination of an infant car seat, a snap-n-go stroller, and a car seat cover (during cold weather).  I know it means having to buy more than one car seat, but I LOVED having an infant car seat (some call it a bucket seat, where you can carry it with baby in it, and it just snaps in and out of the car).  The girls would always fall asleep in the car, even on the short trip from daycare to home (or vice versa).  Having this type of car seat eliminated the need to wake them up from a peaceful slumber!  We would just carefully pop it out and set it inside and let them finish their nap.  This is also a reason for a Snap-N-Go stroller.  If the girls fell asleep on the way to our destination, we were able to attach the car seats to the stroller without having to wake them.   Of course, with a double Snap-N-Go, you become a spectacle with lots of gawkers, and it’s similar to pushing a bus, but oh well, it was worth it!  We used it for a long time (probably until they were about 10 months old) because it was how I transported the girls out of the daycare building and to our car.  They were just too big to carry both infant car seats at the same time.  And finally, the car seat covers we had were awesome.  The girls were born in December, so we had lots of cold weather they needed to be protected from.  I didn’t want to use a coat on them because then they can’t be buckled into the car seat safely, so we had the car seat cover that just wraps around the top of the seat (it doesn’t go under them, which also isn’t very safe).  Ours zipped open to get the girls in and out, and it had a little peep-hole for their faces.  The peep hole also had a flap that could Velcro shut over their faces while we were hustling in and out of buildings on cold days.  If only they could invent these things for convertible car seats, it would make me feel so much better than just putting a blanket on the girls now.
Our infant car seats with the covers on the snap-n-go stroller as we were leaving the hospital after they were born.

Ok, so those are just a few of the baby items that I LOVED and couldn’t live without.  I could probably come up with several more items, but then this post would become a novel!  J Again, this is all just my own opinion, so feel free to disagree or agree with me. 

As we begin the newborn phase again with Will, I’m very curious as to what else is out there that you LOVED.  Please please please share with me in a comment or a message.  I can’t wait to hear from you!

*Disclaimer: This post contains affiliate links

UPDATE 3/25/14: Since having my 3rd child, my days have become more than just "life with twins."  So, I decided to move on over to a new blog!

Come check me out at www.MePlus3Today.blogspot.com!
My new blog deals with kids crafts and activities, mommy ups & downs, and what it's like to suddenly find myself as a 30-year-old widow with 3 kids under the age of 2.

So again, please stop by my new blog, and tell your friends too!

Thanks so much!
~Sarah

Thursday, January 3, 2013

Finger Painting Fun

I work part-time, so I am home with the girls 2 days each week.  I absolutely LOVE having those days with them!  But most of our time is spent just playing with toys in the living room, and on a rare occasion, we might run a few errands.  I thought that they might be getting bored or restless just hanging out in the living room all the time...

So, I decided I'd try adding a structured activity to their days I spend with them.  It would be fun for babies, and fun for mommy!  Or so I thought...


Since they just turned 1, it's not like their motor skills are that great, so we couldn't really attempt to paste some googly eyes onto a toilet paper roll to make some kind of animal (or something like that...).  But finger painting sounded easy enough...

Our first attempt was based on an idea I found for 
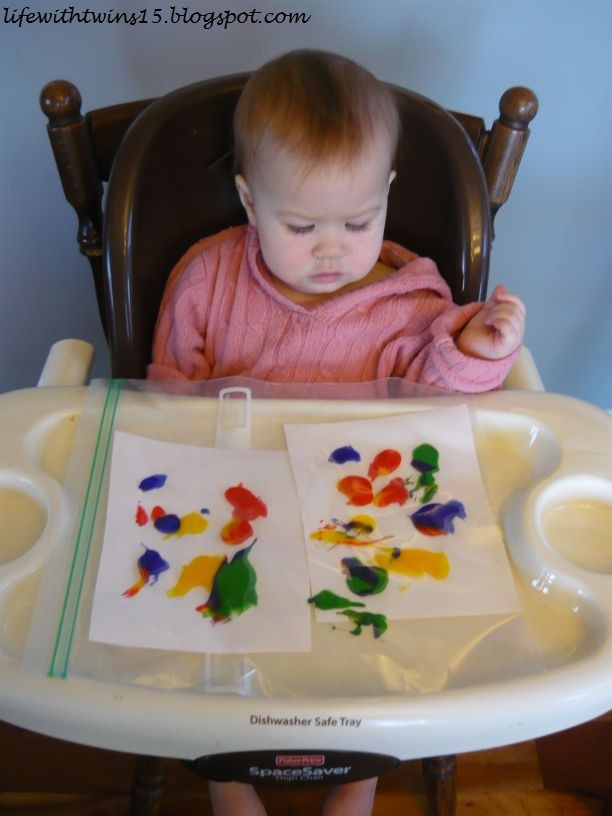
"clean finger painting" on Pinterest.  Basically, you put a piece of paper into a large Ziploc bag with a few globs of paint, and let baby play.  And that's what we did.

I set up all the supplies, sat the girls in their high chairs, and let them get to work!


Violet gets to work on her Clean Finger painting project


Charlotte isn't really sure what to think about this Clean Finger painting project

Clean Finger Painting


Violet


As you can see, Violet seemed to enjoy the project. She liked to crinkle the Ziploc bag, and wave it all over the place. Her colors really spread nicely over the paper!


Charlotte


 Charlotte wasn't really sure what to think... I gave her a little more guidance by pushing her hands onto the paint and showing her how when her hands moved the paint would smear and the color would spread.  I'm not really sure if I was supposed to do that, or if I should have just let her figure it out on her own...

Unfortunately, I forgot to take a picture of their finished art work!  Oh well, there's always next time...

Lessons learned from this project:
1) Don't use too much paint, it really soaks the paper and gets gloppy, which causes it to take a really long time to dry.
2) There has to be a better way of getting the art work out of the plastic bag without getting paint all over my hands... I just haven't figured it out yet. :-)
3) Don't forget to take picture of completed art work!

So, Clean Finger painting was a nice little change from our usual routine.  It gave the girls a "new toy" to play with, and it resulted in some great art work that we used as 'Thank You' cards for their birthday presents from my family.  But it only entertained the girls for a limited amount of time, maybe 5 minutes... And it probably took me that long just to get everything set up for them.

Since I felt like Clean Finger painting was boring, I figured we were ready for some real finger painting!  I also really wanted some cute home-made gifts from the girls for the Illinois side of the family.  So, I found this project on Pinterest, it's a Christmas tree with lights or ornaments. 

We could totally do that!  The girls just needed to paint a sheet of paper green, and then do some hand blobs of other colors randomly on the paper.  It couldn't get any easier!  Or so I thought...

I stripped the girls down to their diapers, and again put them in their high chairs.  I'd learned from Pinterest that it is best to tape the paper to the tray so that it doesn't move around.  I just used a few pieces to tape down the corners.   I'd also learned to have lots of wipes on hand, so I had a bunch of wet paper towel ready to go for clean up.  Then, I put some green globs of paint on the paper and put the trays in front of the girls... That's when the fun started... :-)

Charlotte immediately began to eat the paint.  I guess I confused her because when they are in their high chairs, everything I put on the tray is food...  I doubt it tasted very good, and my reaction of grabbing her hand out of her mouth and telling her "No!" probably didn't help the situation.  I grabbed some of the wet paper towel (thank goodness I had that easily accessible!), and wiped her face and hands.  But she continued to cry, and kept trying to put the paint in her mouth...


Charlotte is not a fan of how finger paint tastes...

Violet, however, had no problems getting started.  She instantly began to smear and smack the paint around on her paper.  Of course, because the paper wasn't as big as the tray, she had a little trouble "staying inside the lines" and paint was everywhere...

Violet wondering why Charlotte is crying...

Violet loves to finger paint!


I ended up having to take Charlotte out of her seat to calm her down, and when I put her back in, I decided to try a different tactic.  I had purchased these little paint sponges from the dollar store, so I gave her one of those to try and paint with, so maybe she wouldn't eat the paint.  It helped... a little...  :-)


Using dollar store paint sponges to paint the "Christmas Tree"

I decided that they had enough green paint everywhere, and it was time to start the lights/ornaments part of the picture.  I put globs of the other colors on a paper plate, and dipped each girls hand into one color, in hopes that they would just smack their hand down in random spots to create the lights/ornaments.  That is NOT what happened.  The girls just smeared the paint all over their "Christmas Tree"...

That's when things started to get really messy.  Yikes!  I mean, I was prepared that there would be paint all over their hands and arms, maybe even their bodies... But I didn't really think about it getting in their hair, on their faces, up their noses, in their ears, and all over their high chairs!!!!  I don't know what I was thinking trying to tackle this project with just me and the girls!!!  Wet paper towel was not going to clean up this mess!!!

Charlotte getting messy...
It's still messy, even with a paint sponge... which they would drop off the tray, causing paint to get on the floor...

Violet adding lights and ornaments to her tree, and face, and body...


Messy Violet...


Charlotte eventually started enjoying finger painting!


Having fun finger painting!

"We need a bath!"
Violet at the end of the project...

Charlotte at the end of the project...

Well, Charlotte ended the project the same way she started!  At least she had a little fun in the middle! :-)

I finally decided that enough was enough.  Their "Christmas Trees" were complete.  Again, I forgot to take pictures of the final product...

I removed the trays from the high chairs and just looked at the girls.  Where was I going to start with this clean up?  I attempted to wipe off most of the paint with the wet paper towels, but I knew that just wasn't going to cut it.  So, I did the best I could with one baby, and set her off to play while I gave the other a quick bath. 

Giving each girl a bath is a serious workout, especially since I'm getting to be gigantic pregnant.  They squirm and wiggle and splash all over.  And just when the bath is done, it gets even worse trying to dry them off, put lotion on them, get a diaper on, and then clothes.  I pretty much have to chase them around with lotion on my hands and pray that they don't pee on the floor.  Then, once I have at least a diaper on one baby, I still have one more baby to bathe!  I can't bathe them both at the same time yet, I'm just not that coordinated, I'm too pregnant, and they are just way too wild in the tub.

Lessons learned from this project:
1) Wait for the first layer (Christmas tree) to dry before adding the lights/ornaments, otherwise, it all just smears together. 
2)  Have bath supplies prepared for clean-up.
3) Tape all 4 edges for the paper completely.  Violet ended up ripping her artwork because she could grab the edges that weren't taped and pull them up.
4) Put down a cloth of some sort beneath the work area so paint does not get on the floor.
5) Paint somewhere they don't usually eat, so they don't think it's food.
6) Don't forget to take picture of completed art work!
7) Maybe try this when there is another person around to help...


So, all in all, Real Finger painting was a lot more intense that Clean Finger painting! And it definitely consumed a lot more time, and was much more entertaining.  It was far from boring!  By the time everyone was all cleaned up, it was nap time for the babies but I was really the one who was exhausted!

At least now I know what to expect, so maybe next time it won't be so crazy... but 'next time' might not be for a while...  :-)

If anyone has any tips/tricks for a better way to finger paint, please let me know.  Also, if you have any ideas on fun activities I can do with the girls, feel free to share.  Thanks! :-)

UPDATE 3/25/14: Since having my 3rd child, my days have become more than just "life with twins."  So, I decided to move on over to a new blog!

Come check me out at www.MePlus3Today.blogspot.com!
My new blog deals with kids crafts and activities, mommy ups & downs, and what it's like to suddenly find myself as a 30-year-old widow with 3 kids under the age of 2.

So again, please stop by my new blog, and tell your friends too!

Thanks so much!
~Sarah